比较常用命令集合
1 | |
docker logs
1 | |
过滤grep
1 | |
1 | |
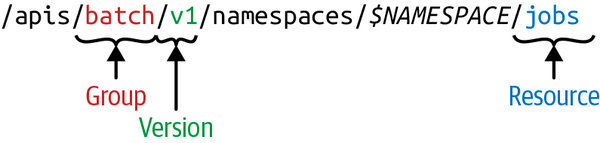
helm
1 | |
How to pass dynamic arguments to a helm chart that runs a job
docker
1 | |
本地端口转发
1 | |
创建一个服务对象来暴露 Deployment
1 | |
proxy
1 | |
删除合集
删除stats
1 | |
删不掉其他资源
1 | |
删不掉k8s namespace
- 正常删除
1 | |
- 强制删除
1 | |
-
修改finalizers
删掉finalizers 和 status “phase”: “Terminating”
1
kubectl edit namespace NAMESPACE_NAME
如果没有上面的finalizers内容,通过调用接口删除
-
接口删除
第一步:将namespace内容导出到tmp.json文件中:
1 | |
第二步:修改tmp.json内容,删除json中以下内容finalizers
1 | |
第三步:开启k8s接口代理,新开一个窗口,执行
1 | |
第四步:调用接口删除Namespace,注意URL中修改成要删除的NAMESPACE_NAME
1 | |
k3s 删不掉
1 | |
删除所有资源
1 | |
当我们的集群中有太多Evicted(被驱逐的) pod,这可能会导致网络负载,因为每个 pod,即使被驱逐的 pod 连接到网络并且在云 Kubernetes 集群的情况下,也会阻止 IP 地址。这可能导致如果您的集群有固定的 IP 地址池,也会耗尽 IP 地址 参考
1 | |
查看kubectl api调用过程
主要是看crd api
1 | |
一般情况下,每个 Unix/Linux 命令运行时都会打开三个文件:
- 标准输入文件(stdin):stdin的文件描述符为0,Unix程序默认从stdin读取数据。
- 标准输出文件(stdout):stdout 的文件描述符为1,Unix程序默认向stdout输出数据。
- 标准错误文件(stderr):stderr的文件描述符为2,Unix程序会向stderr流中写入错误信息。
默认情况下,command > file 将 stdout 重定向到 file,command < file 将stdin 重定向到 file。
| 命令 | 说明 |
|---|---|
| command > file | 将输出重定向到 file。 |
| command < file | 将输入重定向到 file。 |
| command » file | 将输出以追加的方式重定向到 file。 |
| n > file | 将文件描述符为 n 的文件重定向到 file。 |
| n » file | 将文件描述符为 n 的文件以追加的方式重定向到 file。 |
| n >& m | 将输出文件 m 和 n 合并。 |
| n <& m | 将输入文件 m 和 n 合并。 |
| « tag | 将开始标记 tag 和结束标记 tag 之间的内容作为输入。 |
注意:0 是标准输入(STDIN),1 是标准输出(STDOUT),2 是标准错误输出(STDERR)。
这里的 2 和 > 之间不可以有空格,2> 是一体的时候才表示错误输出。
生成ConfigMap配置
1 | |
merge kube config
1 | |
corndns
1 | |
1 | |
1 | |
crd
1 | |
驱逐
1 | |
通过宿主pid获取pod name
某个进程占用资源高
1 | |
测试ingress
1 | |
免密登录
1 | |
常用目录
static pod k8s 存放k8s集群组件
1 | |
Service CIDR
1 | |
CNI插件二进制,配置文件
1 | |
ssl 证书
1 | |
rancher
集群删不掉 Waiting on cluster-scoped-gc
1 | |