1 | |
排错步骤
-
确认路径是存在的,pv,pvc没有错误()
-
确认pod所在的node ip
1
kubectl get pod <podname> -o wide -n namespace -
确认可以连到nfs server
1
telnet <nfs server> port -
run
dmesgto see mounting related errors -
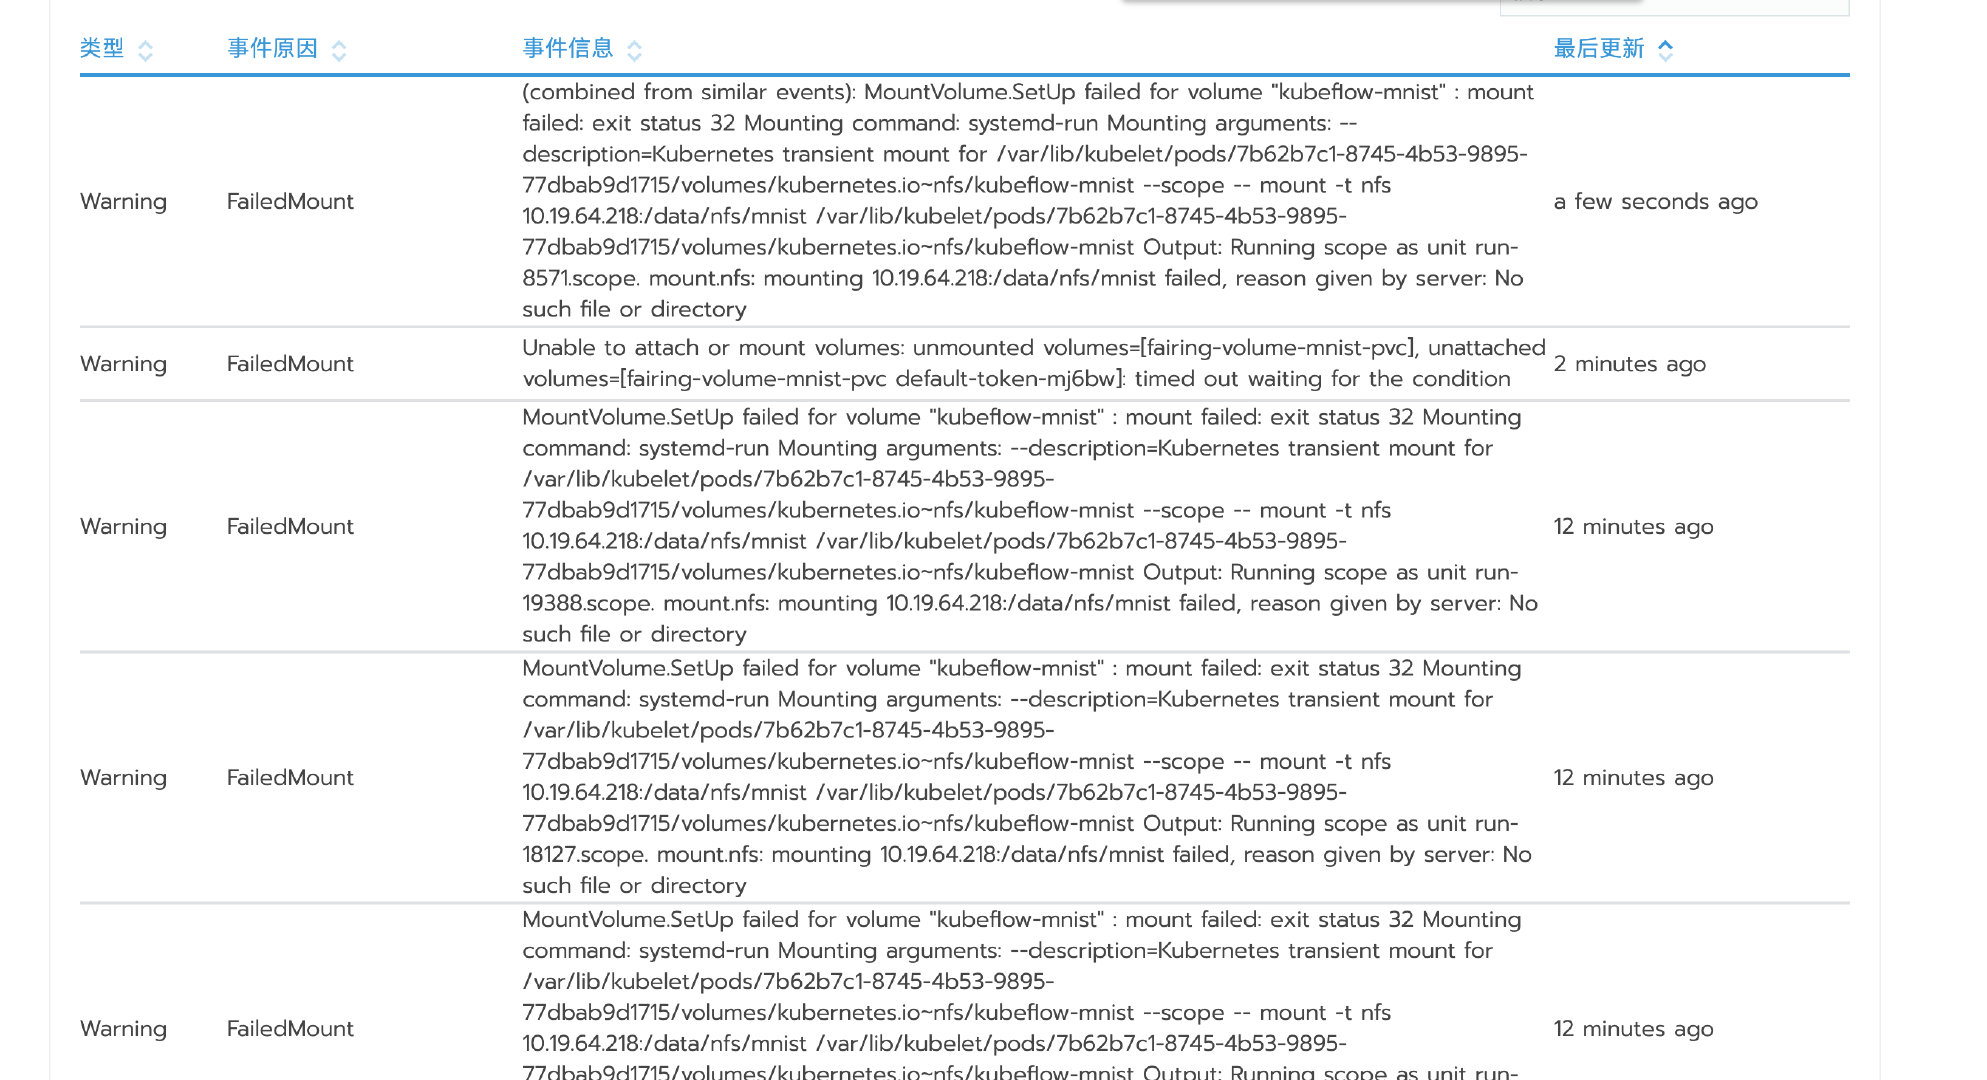
尝试运行报错的命令
mount -t nfs xxx.xxx.xx.218:/data/nfs/mnist /var/lib/kubelet/pods/7b62b7c1-8745-4b53-9895-77dbab9d1715/volumes/kubernetes.io~nfs/kubeflow-mnist
1 | |
1 | |
| 选项 | 内容 |
|---|---|
| rw, ro | 读写的方式共享,只读的方式共享 |
| root_squash | 客户端使用的是root用户时,则映射到NFS服务器的用户为NFS的匿名用户(nfsnobody) |
| no_root_squash | 客户端使用的是root用户时,则映射到FNS服务器的用户依然为root用户 |
| no_all_squash | NFS客户端连接服务端时使用什么用户,对服务端分享的目录来说都是拥有root权限 |
| all_squash | 不论NFS客户端连接服务端时使用什么用户,对服务端分享的目录来说都是拥有匿名用户nobody权限 |
| sync/async | 默认选项,保持数据同步,数据同步写入到内存和硬盘/文件暂存内存,不立刻写入磁盘 |
配置
1 | |
验证
1 | |